Crayon Banner: A Designer’s Review for Craft Fairs
As an embroidery designer who has spent countless weekends setting up booths and managing online shops, I look at every new machine embroidery design through a specific lens. It is not just about whether the artwork looks cute on a screen; it is about how that design translates into a tangible, sellable craft fair product. Recently, I evaluated the Crayon Banner, a vibrant digital asset that immediately caught my eye for its potential in the Back To School season. This review breaks down why this specific design works, where it shines, and what practical considerations you need to keep in mind before you start stitching.
First Impressions: Bold, Playful, and Marketable
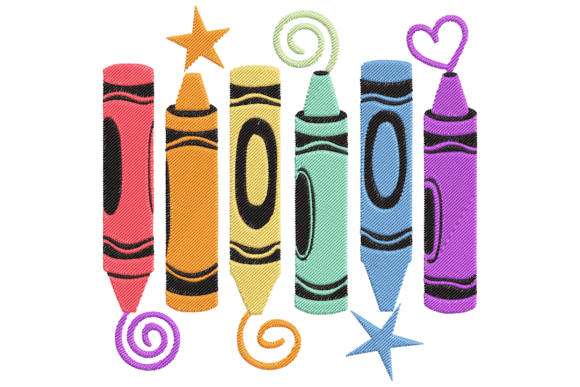
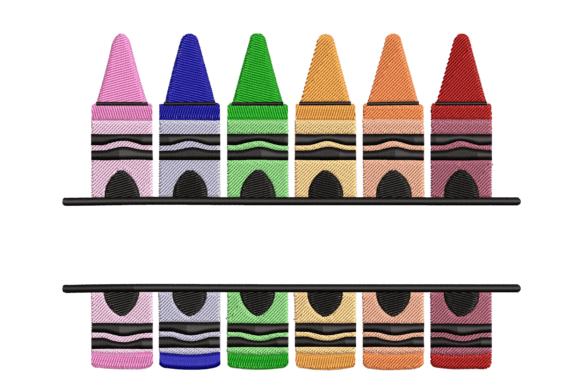
The first thing that strikes me about the Crayon Banner is its immediate visual clarity. In a crowded craft fair environment, customers often scan tables in seconds. They do not have time to decipher complex, subtle details. This design features a row of six crayons arranged as a decorative border, which creates a strong horizontal line that draws the eye across the fabric. The aesthetic is undeniably playful and modern, leaning away from rustic farmhouse styles and firmly into a bright, contemporary niche that appeals to parents, teachers, and young students alike.
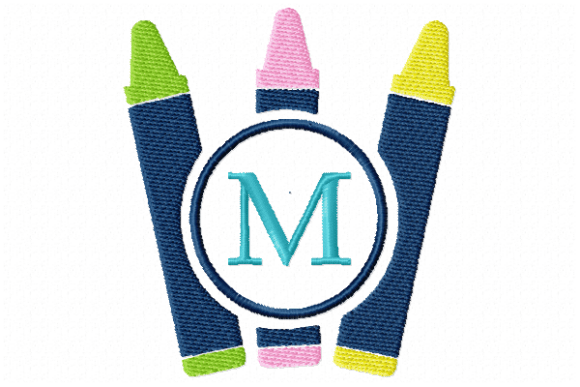
The inclusion of a split frame with a horizontal dividing line is a smart structural choice. It provides a natural space for customization. For an Etsy seller or a boutique maker, this means you can easily add a name, a grade level, or a short phrase like "Ready to Learn" within the frame. This versatility transforms a simple graphic into a personalized handmade product, which significantly increases perceived value and allows for higher price points.
Product Applications: Where This Design Sells Best
When planning my inventory for a weekend market, I am always thinking about batch production and visual impact. The Crayon Banner is exceptionally versatile, but it performs differently depending on the substrate. Here is how I would deploy this design across various items:
- Tote Bags and Market Bags: This is arguably the strongest application. A canvas tote with the crayon border stitched across the bottom or center serves as a perfect tote bag design for school supplies or library books. The horizontal nature of the banner complements the shape of the bag beautifully.
- Aprons and Kitchen Textiles: For apron embroidery, placing the banner across the bib or the lower pocket adds a pop of color without overwhelming the garment. Similarly, tea towel embroidery benefits from the border style, creating a finished look that frames the towel’s edge.
- Embroidered Patches: If you are looking to create small, impulse-buy items, this design works well as an embroidered patch. However, you must ensure the details remain clear at a smaller scale. Patches are excellent for adding to backpacks or pencil cases, extending the product line beyond just clothing.
- Pillow Covers and Home Decor: While less traditional for school themes, a brightly colored pillow cover with this banner can appeal to those decorating a child’s study nook or playroom. It acts as a fun, seasonal accent piece.
Production Practicalities and Stitch Quality
From a production standpoint, the ease of stitching is crucial for maintaining profit margins. When working with a digital embroidery file like this, I always check the stitch density. A design with too many overlapping stitches can cause puckering, especially on lighter fabrics like cotton tea towels. Conversely, if the density is too low, the fabric might show through the thread colors, ruining the vibrant effect of the crayons.
The description notes that this is a high-quality graphic, but as a producer, you must verify the technical specs. Before running a full batch, I recommend testing the design on scrap fabric that matches your final product. Pay close attention to the thread colors. Since crayons are inherently colorful, you will need a wide variety of thread spools. Ensure your machine is properly threaded and tensioned to handle the color changes efficiently. A design that requires excessive trimming or jumping can slow down production, so review the stitch path if your software allows it.
Another critical factor is the hoop size. You need to confirm that the banner fits comfortably within your standard hoop without requiring re-hooping, which can lead to alignment issues. If the design is wide, ensure your machine’s maximum hoop capacity can accommodate it in one go. This efficiency is vital for a small shop product where time is money.
Navigating Fabric Texture and Stabilizer Choices
The success of the Crayon Banner also depends heavily on the material you choose. Textured fabrics, such as waffle-weave towels or heavy denim, can distort fine details. If you are stitching on a textured surface, consider using a cut-away stabilizer to provide lasting support and prevent the design from sinking into the fabric weave. For smoother fabrics like canvas totes or twill caps, a tear-away stabilizer might suffice, but always test first.
Dark fabrics present another challenge. The vibrant colors of the crayons may not pop against black or navy blue unless you use an underlay stitch or a white backing thread to boost brightness. If you plan to offer this design on dark garments, create a sample to ensure the colors remain true and vivid. This attention to detail distinguishes a professional finished product from an amateur attempt.
Marketing and Visual Appeal for Online and Offline Sales
In today’s market, how a product photographs is just as important as how it looks in person. The Crayon Banner is highly photogenic due to its bold lines and contrasting colors. When creating listings for your online store, use a printable mockup to visualize the design on different products before you even stitch a single thread. This helps in planning your inventory mix and creating cohesive social media content.
For craft fairs, display strength is key. Grouping items that feature the same design creates a powerful visual block. Imagine a table with matching tote bags, aprons, and patches all featuring the Crayon Banner. This consistency reinforces your brand identity and makes the booth look curated and professional. Customers are more likely to engage with a display that tells a clear story, and this design clearly communicates a theme of creativity and education.
Final Designer Notes for Commercial Use
Before you launch this design into your commercial embroidery lineup, there are a few final checks to perform. First, confirm the licensing terms. Ensure that the design assets you purchased allow for the sale of finished physical goods. Most designers allow this, but it is always safer to double-check than to face legal issues later.
Second, inspect the split frame element. If you plan to add text, choose a font that complements the playful nature of the crayons but remains legible. Avoid overly script-heavy fonts that might clash with the geometric shapes of the crayons. Finally, consider the seasonality. While this is a prime Back To School item, the theme of creativity is year-round. Market it as a gift for young artists, birthday presents, or teacher appreciation gifts to extend its sales window beyond August and September.
In conclusion, the Crayon Banner is a strong contender for any embroidery business looking to expand its seasonal offerings. It balances aesthetic appeal with practical production needs, offering a clear path to creating high-value, eye-catching products. By paying attention to fabric choices, stabilizer types, and marketing presentation, you can turn this digital file into a bestseller for your shop.